Friday, November 30, 2012

Do you have to change the oil every 3,000 miles?

Like the five-day work week and glasses in about an hour, the 3,000-mile oil change is part of the American consciousness. Whether you follow the guideline or not, the number remains the same, decade after decade and car after car. It's been around so long, most of us don't even question its veracity.

But where does the recommendation come from, and is it legitimate?

If you check your car's user manual, you'll probably find you've been changing your oil more often than you need to, at least according to the people who designed your car. Most carmakers abandoned the 3,000-mile (4,828-kilometer) interval long ago, opting instead to advise their customers to go 5,000 or 7,500 miles (8,046 or 12,070 kilometers) between oil changes [source: MEMA]. Some people even go 10,000 miles (16,093 kilometers) or more without any guilt -- or damage to the engine.

The 3,000-mile guideline dates back to a time when motor oil wasn't quite as advanced as it is now. It used to be that if oil were left in the crankcase too long, it would start to degrade, causing a buildup of sludge [source: Torbjornsen]. But over the years, as tailpipe-emissions regulations have changed, so have engines and the oils that keep them running smoothly. Today's motor oils don't break down as quickly. Under ideal driving conditions, some synthetic oils can go about 25,000 miles (40,233 kilometers) [source: CIWMB].

Of course, driving conditions are seldom ideal. Lots of idling, stop-and-go traffic, extremely hot or cold weather, humidity and towing can all decrease the lifespan of engine oil. Plus, every car is a little different. The interval that is perfectly fine for one car could be way too long for another. So in reality, very few drivers will go 25,000 miles without an oil change, even if they spring for high-grade synthetic oil. And most of them shouldn't, although some can go 10,000 without a problem [source: CIWMB].

And yet most people still aim for 3,000-mile changes, perhaps because they don't know it's excessive, or perhaps because they adhere to an extreme better-safe-than-sorry principle. The result is millions of extra dollars wasted on oil changes and millions of extra gallons of oil potentially polluting the environment.

The best advice, then? Ignore the oil industry and go by your car's user manual, which will probably advise an interval of 5,000 miles or more. You'll save some money -- and possibly keep the world a little greener in the process.

Article courtesy of: http://auto.howstuffworks.com/under-the-hood/vehicle-maintenance/change-oil-3000-miles.htm

Tuesday, November 20, 2012

10 Things Teens Should Know About Cars and Driving

When a teenager gets a driver license, it signifies freedom and the lure of the open road. But with this newfound freedom comes a host of new situations and possible problems that most teen drivers have never encountered before. It's a good idea to review these scenarios with new drivers in your family, and discuss how to handle them before they happen for real.

From traffic stops to road rage, here's a primer on what you need to tell teen drivers as they take to the roads.

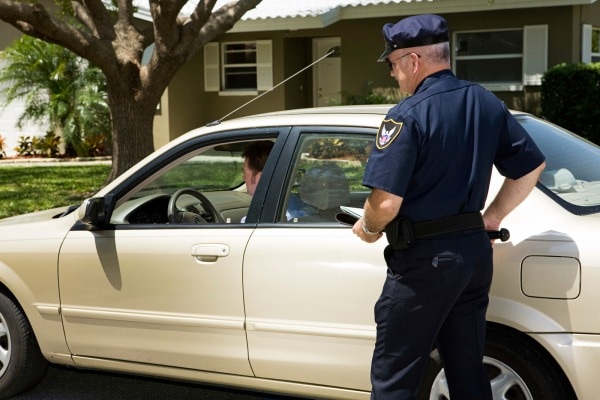
1. What to do when you're stopped by a police officer
Safely pull to the side of the road, turn off your car, roll down the window and keep your hands visible. Don't make any sudden moves or argue with the officer. Do your arguing in traffic court.

2. How to deal with a flat tire
Pull completely off the road, even if it means destroying the tire. Call roadside assistance and let that person change the tire. If you have a spare (many cars now only have an inflation kit) and know how to change the tire, make sure you are out of traffic and in plain sight of oncoming traffic before changing it yourself.

3. What to do when the "check engine" light comes on
If there is any change in the car's performance, any mechanical noises, smoke from the tailpipe or electrical smells, stop the car and call for assistance. If there are none of these symptoms, take the car to a dealer and let them diagnose the problem. However, if you just bought gas, the light might just be indicating that the gas cap is loose. Tighten the cap and continue driving. The light should go off on its own.

4. How to deal with a friend who is about to drive under the influence
Don't get in the car. Do anything not to drive with an intoxicated person, and that includes calling your parents for a lift or paying for a taxi. Your next move is to try to prevent your drunken friend from hurting themselves or someone else.

5. How to drive safely while talking on a cell phone
Most states ban all cell phone use by novice drivers, so be sure you know if these provisions apply where you live. If it's permissible to use a cell, always use a hands-free device so you can keep your hands on the wheel and your eyes on the road. Learn how to pair your phone with the car's Bluetooth system. Don't even think about texting while driving (no, not even at stoplights).

6. How to get an honest quote for an automotive repair
Search Edmunds.com's Car Maintenance Guide or the Web to get an estimate for how much the repair should cost. Search online for garages with high customer ratings and ask friends for recommended garages. Call the garage and ask for a ballpark estimate and let the garage know you are contacting other places for their best quote. Use your intuition to make the final decision on whom to trust.

7. How to buy a new car
Don't just wander onto a dealership's car lot. Instead, contact the Internet department of several dealerships to get multiple quotes and compare these with Edmunds.com's True Market Value®price for any car you're interested in. Make sure you check incentives and rebates. Follow up with phone calls to the Internet managers of these dealerships to verify the terms of their offers. Finally, ask the dealership to deliver the car to your home or office to avoid the hard sell in the finance and insurance office.

8. What to do after an auto accident
If the car is drivable and there are no serious injuries, turn on your flashers and pull safely out of traffic. Call the police to report the accident. Exchange insurance information with the other driver but refrain from discussing the accident and who is at fault. Make notes and use your cell phone's camera to take pictures of the cars involved.

9. How to drive in rain and snow
Reduce your speed and leave more room between your vehicle and those in front of you. Understand how to handle skids. If possible, practice reacting to skidding in safe conditions, such as a snow-covered empty parking lot. Understand that a car might hydroplane on a rain puddle on the road and learn how to react to driving with reduced traction and visibility.

10. How to avoid road rage situations
Understand the severe consequences to you, your car and your driving record when minor disagreements escalate to life-threatening situations. When someone offends you, take a deep breath and know that your anger will dissolve in minutes. Don't anger other drivers by cutting them off or tailgating. If you've inadvertently angered another driver, don't get drawn into interacting with them. Ignore them or, if necessary, change your route. Finally, repeat this phrase: It's just not worth it.

Read more: http://www.edmunds.com/driving-tips/10-things-teens-should-know-about-cars-and-driving.html

Wednesday, November 14, 2012

Avoid “Turkey” of a Weekend with Pre-Trip Vehicle Check

One way to avoid a turkey of a Thanksgiving road trip is to make sure the vehicle you will be driving is running well. A 10-minute pre-trip check is small potatoes compared to a big helping of inconvenience if you break down many miles away from home, according to the Car Care Council.

“A pre-trip vehicle check provides peace of mind, helping reduce the chance of costly car trouble and providing an opportunity to have any repairs performed by one’s own trusted technician before hitting the road,” said Rich White, executive director, Car Care Council. “While no inspection can guarantee a car’s performance, it’s comforting to know proper precautions were taken to ensure a stress-free Thanksgiving road trip.”

The Car Care Council suggests the following 10-minute vehicle check to help ensure safety and reliability on the road:

  • Check the tires, including tire pressure and tread. Uneven wear indicates a need for wheel alignment. Tires should also be checked for bulges and bald spots.
  • Check all fluids, including engine oil, power steering and brake and transmission, as well as windshield washer solvent and antifreeze/coolant.
  • Check the hoses and belts that can become cracked, brittle, frayed, loose or show signs of excessive wear. These are critical to the proper functioning of the electrical system, air conditioning, power steering and the cooling system.
  • Check lighting to identify any problems with exterior and interior lighting as the chance of an accident increases if you can’t see or be seen.
  • Check wipers. Wiper blades should be replaced every six months. Make sure the windshield wipers are working properly and keep the reservoir filled with solvent.

The Car Care Council also recommends that motorists restock their emergency kit. To save on fuel costs during the trip, the council suggests that motorists avoid aggressive driving, observe the speed limit and avoid excessive idling. Gas caps that are damaged, loose or missing should be replaced to prevent gas from spilling or evaporating.

Courtesy of: http://www.carcare.org/2012/11/avoid-turkey-of-a-weekend-with-pre-trip-vehicle-check/

Wednesday, November 7, 2012

How to Jump a Car

The first thing you want to remember when jump-starting a car is that a slight possibility of explosion does exist. This is because hydrogen gas--which forms as a battery discharges and loses its fluid--is flammable, and a spark from the battery cables could, theoretically, set it off. We emphasize slight because the gas would have to be fairly dense around the battery for this to happen. This is unlikely unless the battery has been sitting for a long time and little or no air circulation has occurred in the area, but it is possible.

That said, I should add that in the last 15 years I have performed at least 50 "jumps" on various automobiles (you see, I used to own a lot of Chrysler muscle cars) and have never had a problem. One of the keys to avoiding the big bang is to hook up your jumper cables in the proper order. Follow along and we'll show you how.

Step One
Park the booster vehicle close to the one that needs to be jumped, but not so close that the vehicles are touching in any way. You'll want to use a good set of jumper cables with thick wire and clean clamps. As you are hooking up the jumper cables, make sure they don't dangle into either engine compartment where they could get caught on moving parts (belts, fan, etc.). Turn off the ignition of both vehicles, set the parking brakes, and make sure that they are in either "Park" or "Neutral" depending on whether the vehicles have an automatic or manual transmission. Also, turn off all accessories like lights, radio and, if the vehicles are in a safe area, the hazard flashers.

Step Two
Begin the process by clamping one of the positive jumper cable ends (red) to the positive battery terminal (labeled with a "+" on the battery) of the dead vehicle. Be sure the connection is strong with the clamp securely "biting" onto the battery terminal.

Step Three
Connect the other end of the positive cable (red) to the positive battery terminal on the booster vehicle (again, confirm that a "+" is next to the battery terminal). If the terminals are corroded on either vehicle, you may have to scrape them with an abrasive such as steel wool to achieve a solid connection.

Step Four
Connect the negative cable end (black) to the negative battery terminal on the booster car (marked with a "-"). Finally, attach the other end of the negative cable to an unpainted metal surface on the engine of the dead car. Find an unpainted bolt or bracket that is as far from the dead battery as possible. This will provide a solid ground while further reducing the possibility of igniting any hydrogen gas.

Step Five
Make a final check to confirm that the jumper cables are not near any moving engine parts, and start the booster car. Let it idle for several minutes, depending on the state of the dead battery. If the dead battery is new and was drained by the lights being left on an extended period of time, it will probably start immediately. If it is an old battery or it has sat for a long time (more than a month) it will probably take awhile to charge it sufficently.

Step Six
Start the dead vehicle and let the two vehicles idle for a few minutes. If the dead vehicle refuses to start, don't keep trying or you might damage the starter. If there is the possibility of additional problems, like a lack of fuel, don't continue trying to start the dead vehicle until the other problem(s) are solved.

Step Seven
Once the dead vehicle is started and running smoothly, disconnect the jumper cables in the reverse order that they were connected. As you disconnect them, be careful not to let the dangling cables fall into the engine compartments or touch each other.

Step Eight
Drive the revived car to somewhere safe and secure before shutting off the engine. Depending on the battery's condition, it might need to be jumped the next time it is started. To properly charge the battery, attach it to a certified battery charger and leave it connected for at least 12 hours. You can also take it to an automotive repair shop for complete charging. Driving the car for an extended period can also charge the battery, but this should be done only if the other two options aren't available. A vehicle's alternator is primarily designed to maintain a battery, not charge it from a complete drain.

Article courtesy of: http://www.edmunds.com/how-to/jump-start.html